
Fermentation Station
As a pickling enthusiast, I’m always on the lookout for new ways to preserve the harvest. Recently, I had the opportunity to learn from Adam James, a full-time professional fermenter who has converted his small home in Hobart into a small-scale fermentation station. Adam’s passion for fermentation is infectious, and I was excited to learn from him.
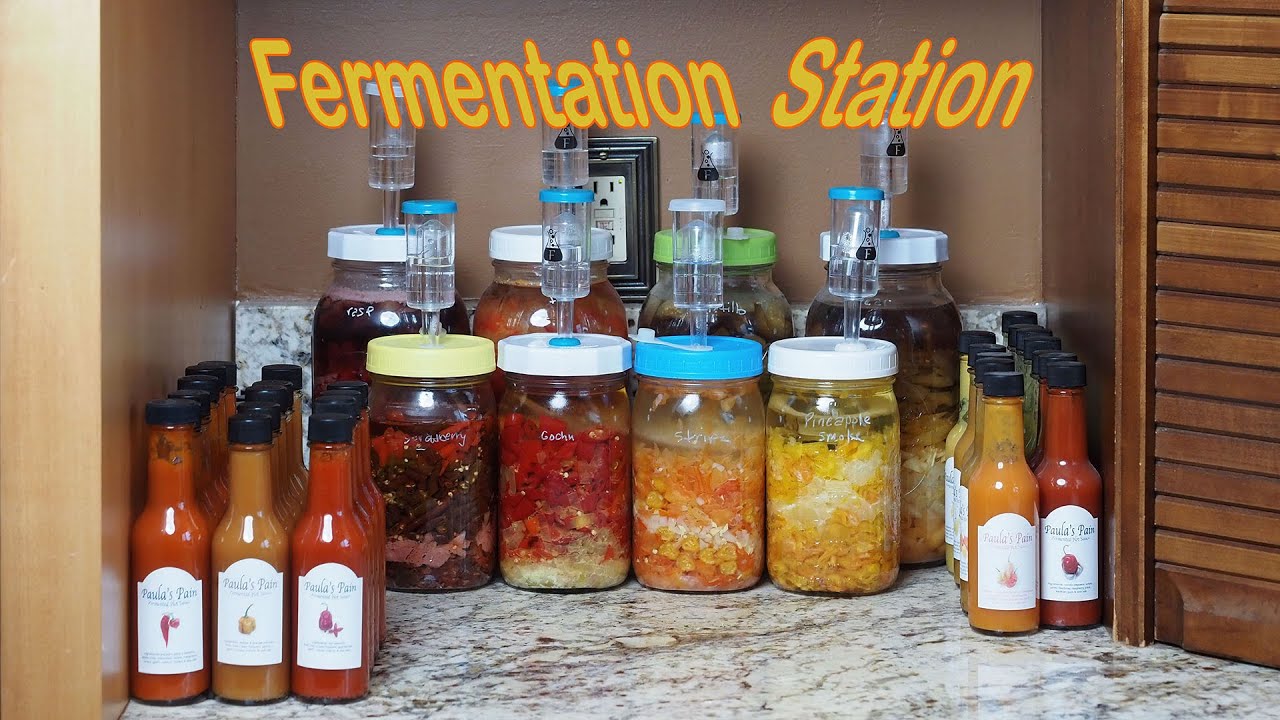 Fermentation station
Adam’s fermentation station is packed with jars of colourful ferments, each one a testament to the magic of wild, lacto-fermentation. This type of fermentation doesn’t use a starter, instead relying on the natural lactic acid bacteria (LAB) that occurs on the surface of the vegetables. When salt is added, it suppresses damaging bacteria, allowing the LAB to thrive. The lactic acid bacteria converts sugars and starches in vegetables into lactic acid, creating a natural preservative that slows down the decomposition of the food and makes it extra tasty!
What You Need for Wild Fermentation
The principles of wild fermentation are simple: vegetables + salt + time! Naturally juicy vegetables, like tomatoes or cabbage, will release moisture when salted, minimizing the need for additional water. Vegetables like carrots and radishes will need to be covered in a salty brine.
End of Summer Salsa Recipe
Prepare the Veg
Chop off any stalks or rotten flesh. Cut vegetables roughly in half and add to a big bowl or food processor.
Calculate & Add Salt
The amount of salt required depends on taste, but successful fermentation requires between 2% - 5% of your total chopped vegetable weight.
Method
- Add required salt to chopped vegetables
- Blend using a food processor or stick blender
- Pour your vegetable & salt mix into a large fermenting croc or a sterilized jar
- Add a sprinkle of salt onto the surface to discourage mold
- As your vegetables ferment, they release CO2. It’s important to loosen the lid and release the gas daily (burp your ferment!) to prevent a build-up of gas.
“It’s common for a whitish mold to form on the surface. This is called kahm yeast and is completely harmless. Simply pour/scrape off the surface. If other colors of mold appear, then best to discard and start again.” - Adam James
- After 1-2 weeks, begin tasting. It can take a week or months, but when the ferment tastes good to you, it’s ready! Put it in your fermentation-slowing device, otherwise known as the fridge.
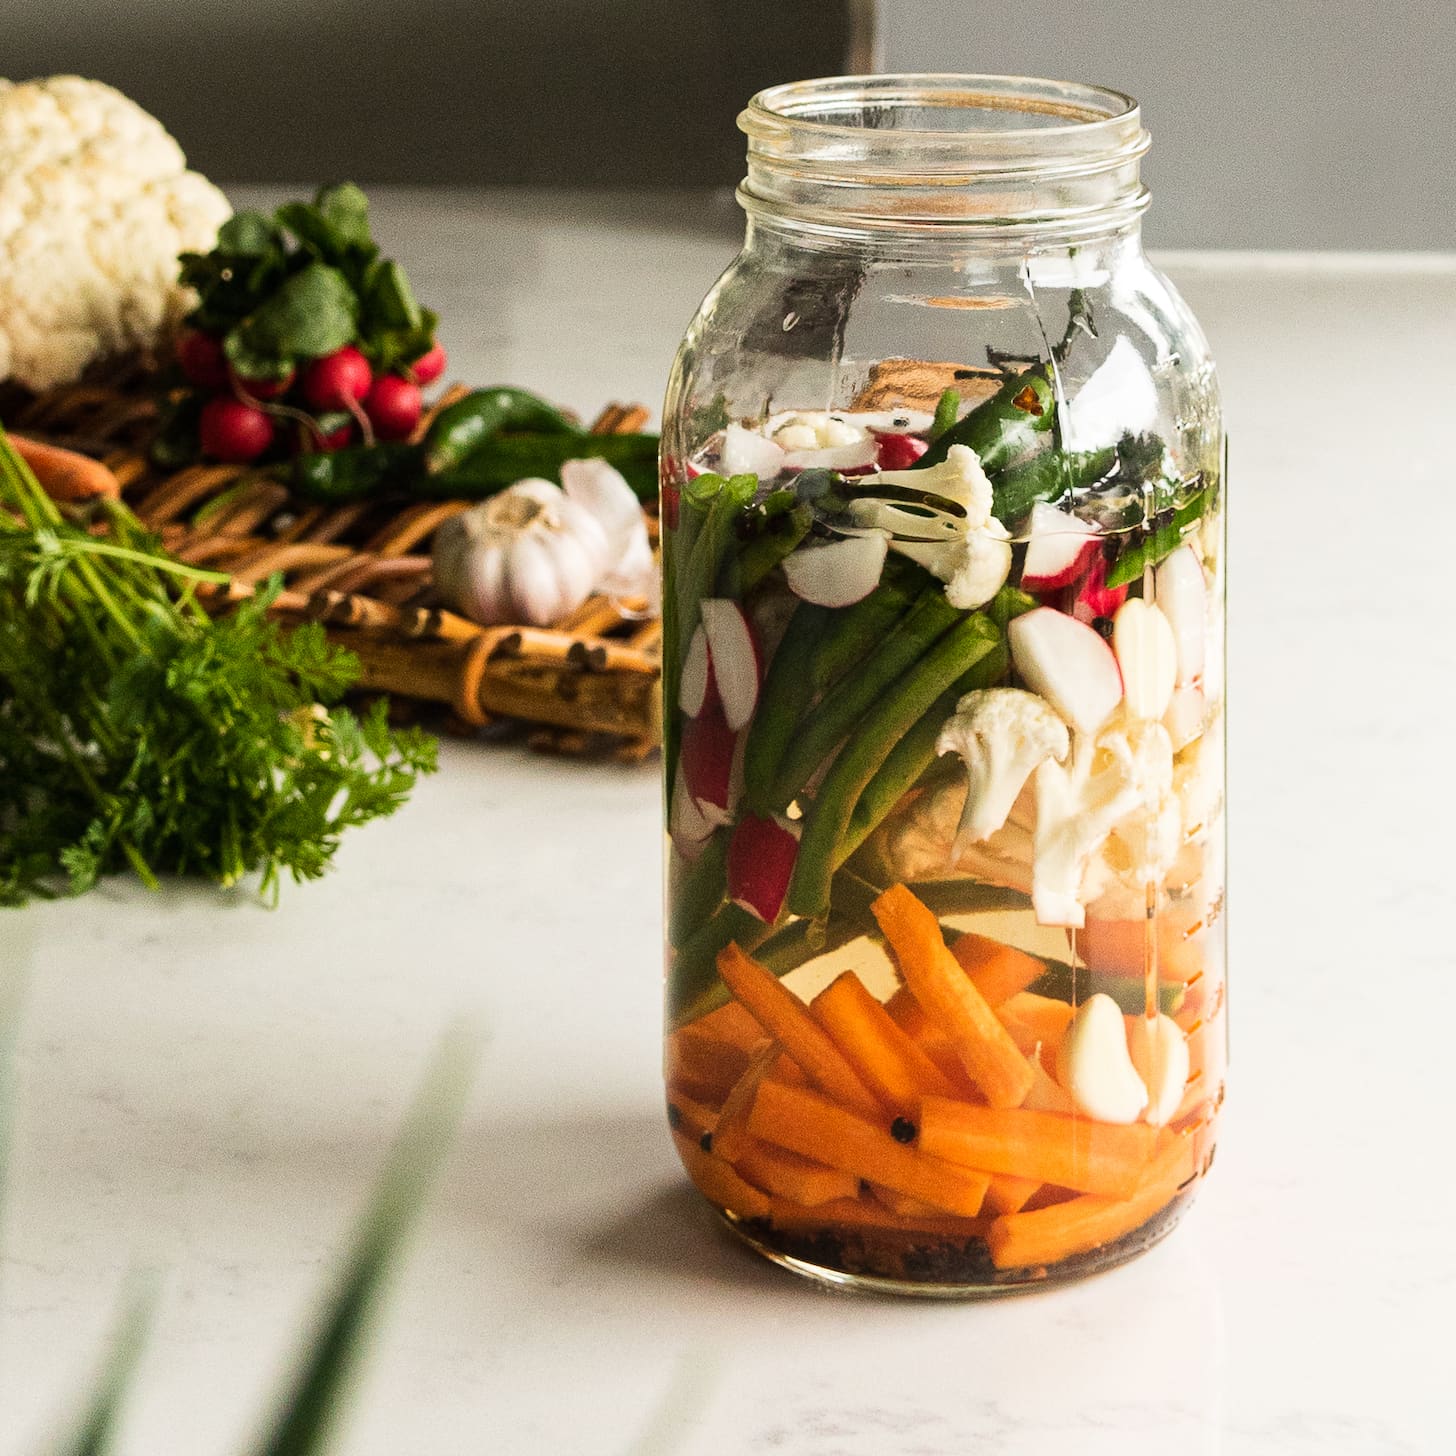
Pickling Brine Recipe
This technique is used to ferment whole or non-fleshy vegetables.
What You Need
- Vegetables (e.g., carrot, radish, green beans)
- Filtered water + sea salt
For a pickling brine, it’s best to use a 2% salt brine. For every 1 L of filtered water, add 20 grams of salt.
Method
- Bring water to the boil, remove from heat, add salt, and stir to dissolve.
- Allow the brine to cool to room temperature before adding it to your vegetables. You can leave the vegetables whole or dice them up. The smaller your vegetables are cut, the faster the fermentation will happen.
- Put your vegetables into a clean jar or fermenting croc and top with your 2% brine.
- Make sure all vegetables are submerged and leave at room temperature for between 1 week and 2 months.
 Fermented vegetables
Fermentation is one of the world’s oldest ways of preserving food, transforming produce that would typically go to waste into delicious and nutritious preserves. If your kitchen bench or fridge has ever overflowed with a glut of fresh produce, then fermentation is for you!
Fermentation station
I hope this article has inspired you to give fermentation a try. With a little patience and practice, you can create delicious and healthy ferments that will elevate your pickling game. Happy fermenting!


